

")
")

")
")
")
")
")


")
")

")
")
")
")
")
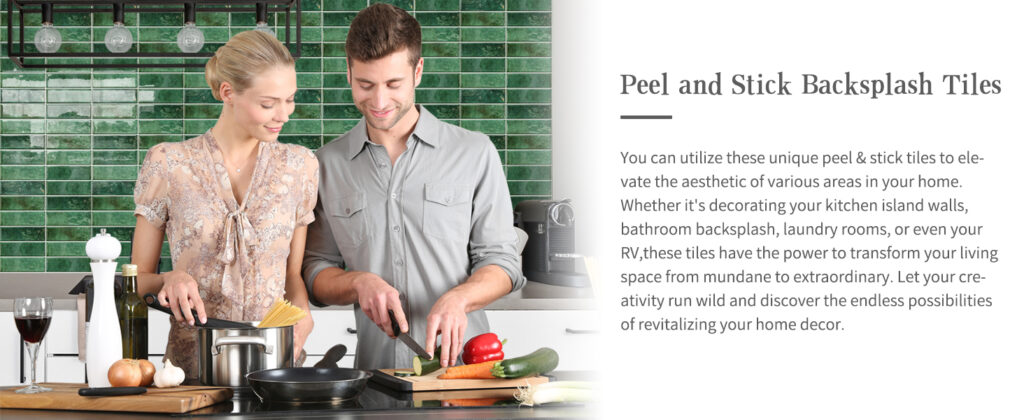
DEKA Premium 3D Epoxy Vinyl Tiles
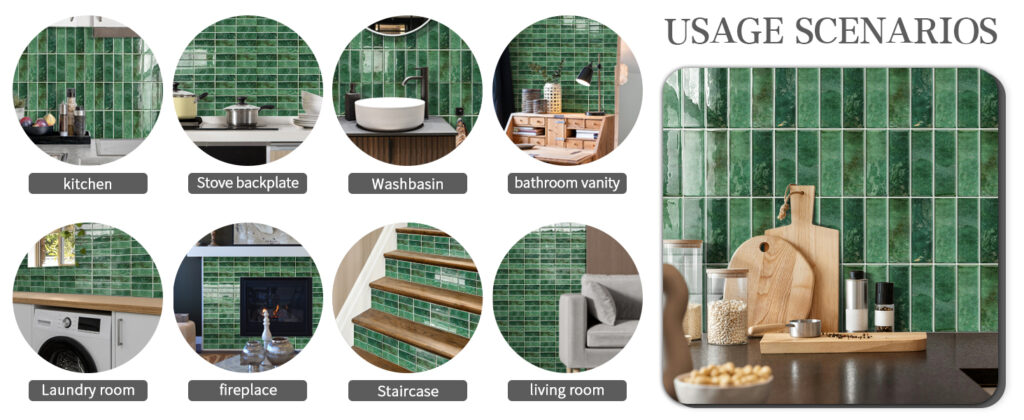
Elevate your interior with the perfect fusion of minimalist aesthetics and advanced material engineering. These 12×12 inch tiles are designed for those who value sophisticated “quiet luxury” alongside practical, long-term durability.
### Key Features & Benefits
-
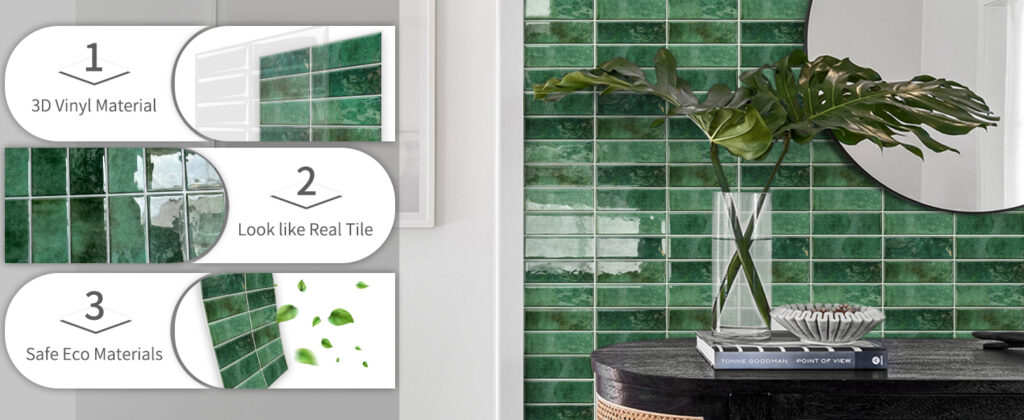
Dimensional 3D Epoxy Surface
Experience the tactile depth of authentic ceramic or glass tiles. Unlike flat vinyl stickers, our 3D epoxy resin layer provides a realistic, high-gloss relief that catches the light beautifully, adding a high-end architectural feel to any room.
-
The Power of Minimalist Design
Designed to be “fatigue-proof,” the palette and clean lines offer a timeless look. In a world of busy patterns, this minimalist approach creates a calming, sophisticated backdrop that complements both contemporary and mid-century modern decor.
-
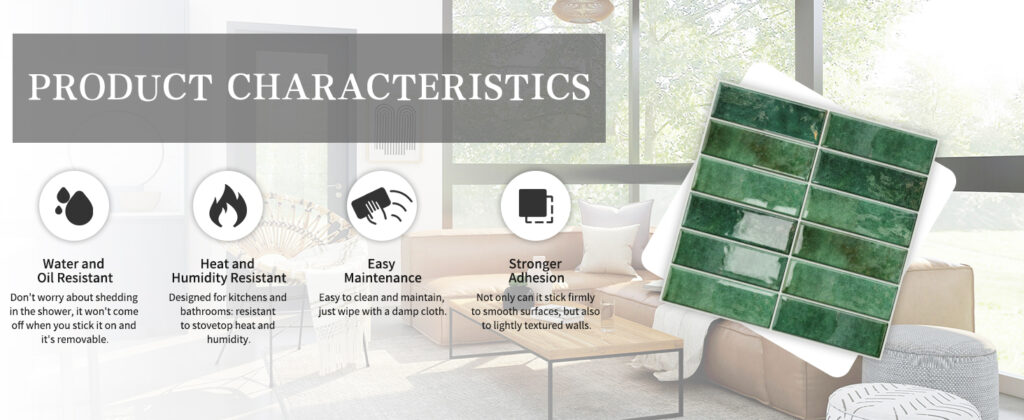
Ultra-Thin, High-Adhesion Profile
Engineered with a specialized thin-sticker core, these tiles are designed to maximize surface contact. This eliminates the “edge-lifting” common in thicker, heavier DIY products, ensuring the adhesive stays bonded to your walls even in high-traffic areas.
-
Professional Shingle-Style Waterproofing
Our recommended Bottom-to-Top installation method utilizes a smart overlapping technique. By placing the upper tile slightly over the lower edge, you create a natural “shingle” effect that prevents moisture from seeping behind the adhesive. This makes it an ideal, reliable solution for humid environments like kitchens and laundry rooms.
-
Zero-Tool “Peel & Stick” Technology
Skip the mortar, grout, and heavy machinery. This hassle-free upgrade allows you to transform a backsplash or accent wall in a single afternoon. Simply peel, align, and press.
### Technical Specifications
| Specification | Details |
| Material | Premium Vinyl with 3D Epoxy Coating |
| Dimensions | 7.87“x7.87“ (20 cm x 20cm) |
| Weight | 1.04 kg (Solid, high-density construction) |
| Color/Pattern | GREEN |
| Application | Peel and Stick / Self-Adhesive |
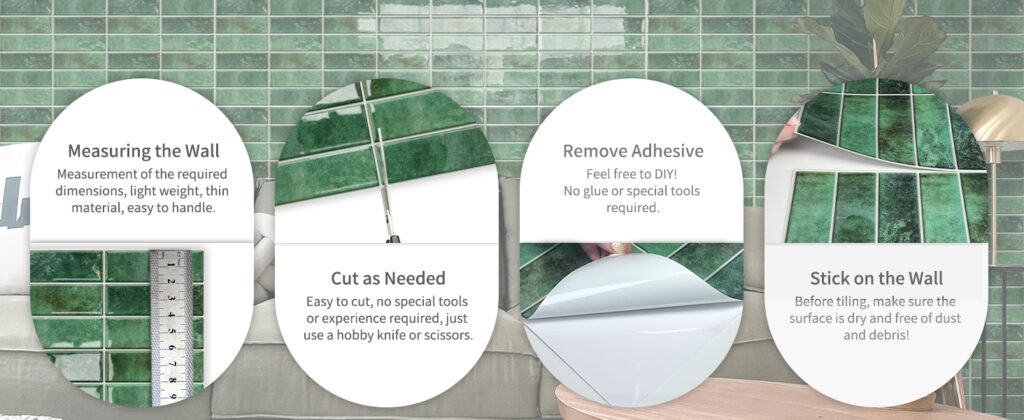
### Optimized Installation Guide
To ensure a 100% waterproof seal and professional finish:
-
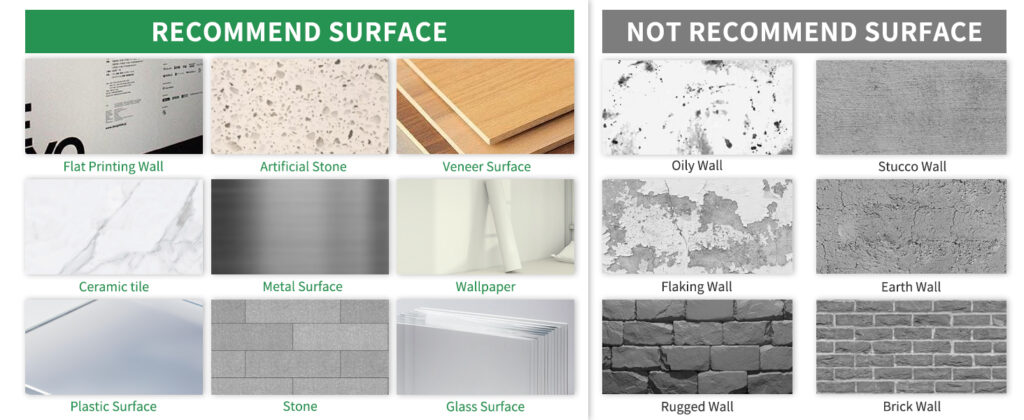
Preparation: Clean the wall with a degreaser to remove any oils.
-
Direction: Always start from the bottom of the project area and work your way up.
-
The Overlap: Ensure the top edge of the lower tile is tucked under the bottom edge of the tile above it to guide water away from the adhesive layer.
-
Final Set: Use a soft cloth or brayer to apply firm pressure across the 3D surface to lock the bond.
[contact-form][contact-field label=”Name” type=”name” required=”1″][contact-field label=”Email” type=”email” required=”1″][contact-field label=”Phone” type=”text” required=”1″][contact-field label=”Message” type=”textarea” required=”1″][/contact-form]
 Pink (6)")

")

